🚀 Introduction
If you are starting with React, one of the first challenges is setting up your environment and running your project locally. Many beginners face errors like “node is not recognized” or “npm is not recognized”.
In this guide, we will cover everything from installing Node.js to running and building a React application step by step.
This guide follows a real-world workflow:
- First check your system
- If already configured → continue
- If not → install and fix
- Then run React project
🧭 Step 1: Check if Node.js is Already Installed
Open Terminal / PowerShell and run:
node -v
npm -v
✅ Case 1: If You See Versions
Example:
v18.17.0
9.6.7
👉 Good — Node.js is already installed.
➡️ Skip installation and go to Step 4 (Run Project)
❌ Case 2: If You Get Error
Example error:
'node' is not recognized
'npm' is not recognized
👉 This means:
- Node.js is NOT installed
OR - Installed but not configured properly
➡️ Follow Step 2
🧰 Step 2: Install Node.js
Download
Go to: https://nodejs.org
Download the LTS version (Recommended)
Install
While installing, ensure:
✔ Click Next on all steps
✔ IMPORTANT: Enable “Add to PATH”
This step is critical — without it, Node will not work in terminal.
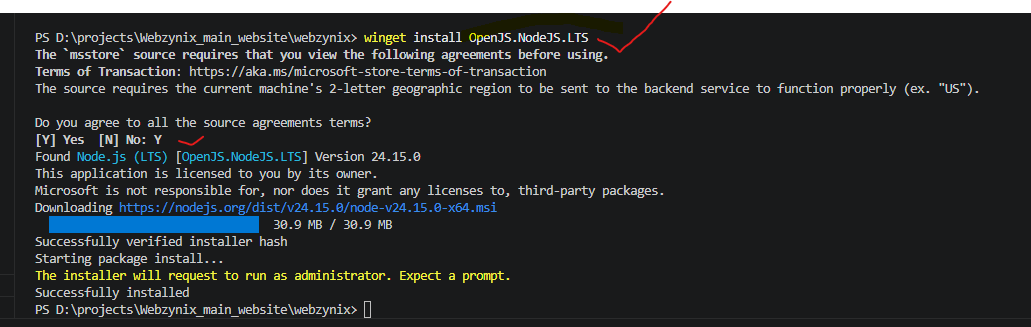
Or with one cammand you can downlaod and install the node.js
Command is : winget install OpenJS.NodeJS.LTS
- Install Node.js
- Install npm
- Configure PATH automatically
After Installation
- Close terminal / VS Code
- Open it again
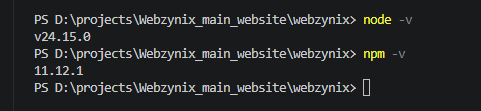
Check again:
node -v
npm -v
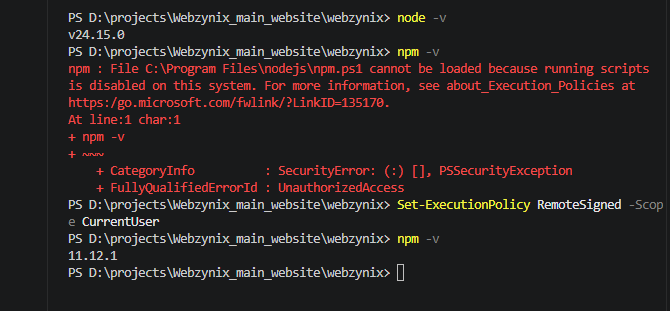
If npm -v not worked:
run : Set-ExecutionPolicy RemoteSigned -Scope CurrentUser
As may be some permissions issue, that cmd will resolve it.
⚠️ Step 3: Fix "Node Not Recognized" Error (If Still Failing)
If you still get the error after installation:
🔹 Reason : Node is not added to system PATH
🔹 Fix Manually
Step 1: Find Installation Path
Usually:
C:\Program Files\nodejs\
Step 2: Add to PATH
- Search: Environment Variables
- Click: Edit system environment variables
- Click: Environment Variables
- Under System Variables → select Path → Edit
- Click New and add:
C:\Program Files\nodejs\ - Click OK and save
Step 3: Restart System
Then check again:
node -v
npm -v
📁 Step 4: Go to Your React Project
Navigate to your project folder:
cd your-project-folder
Example:
cd D:\projects\Webzynix_main_website\webzynix
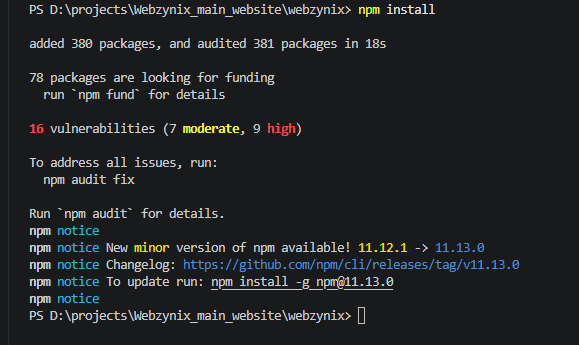
📦 Step 5: Install Project Dependencies
Run:
npm install
This installs all required packages from package.json
▶️ Step 6: Run Project (Development Mode)
Run:
npm run dev
Then open:
http://localhost:<port> ->Will be availble in console.
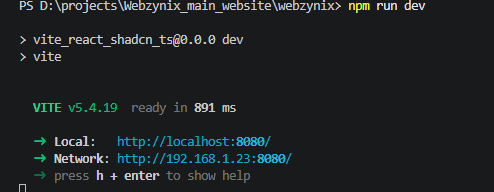
💡 Development Mode Explained
- Auto reload on code changes
- Used during development
- Not optimized
▶️ Step 6a): open the project and test it

🏗️ Step 7: Create Production Build
Run:
npm run build
This creates a build folder with optimized files
🖥️ Step 8: Run Production Build Locally
React build cannot run directly by opening index.html
Option 1: Using serve
Install:
npm install -g serve
Run:
serve -s build
Option 2: Without Installation
npx serve -s build
🌐 Step 9: Access from Mobile / Other Devices
Step 1: Find IP
ipconfig
Example:
192.168.1.10
Step 2: Open in Mobile
Make sure both devices are on same WiFi
⚠️ Common Issues
Node not recognized
👉 Fix PATH or reinstall Node
Port already in use
npx kill-port 3000
Blank page after build
Add in package.json:
"homepage": "."
Dependencies error
npm install
🎯 Conclusion
Now you have a complete workflow:
- Check Node installation
- Install if missing
- Fix PATH issues
- Run React project
- Build for production
- Serve locally
This is the correct real-world approach every developer should follow.

Comments
No comments yet.